Old Splotchy: A-20 Part 5
Adding the “spots” to this particular color scheme is a real problem for the model builder–even if you use an airbrush, it’s a problem. You have to mask it (how?) and then spray, or try to fake it without masking and just assume you’ll get by on the universal “airbrushed is OK” rule.
On the other hand, a brushpainter is going to find it rough going because paint applied in spots tends to look like it was applied that way. It’s almost impossible to get rid of the brushmarks. My solution is to use glossy paint– specifically Tamiya’s gloss acrylic colors mixed to match my “vision” of how this should look. I ended up with a very pale “tan.” The Tamiya paint (gloss) is much better at self-leveling and not showing brushmarks than any other paint I’ve used.
The initial sand and spinach camouflage was done using MM Acryl mixed to match the Leynwood painting. These are flat colors, but a coat of Future made them shiny. I then applied some decals.
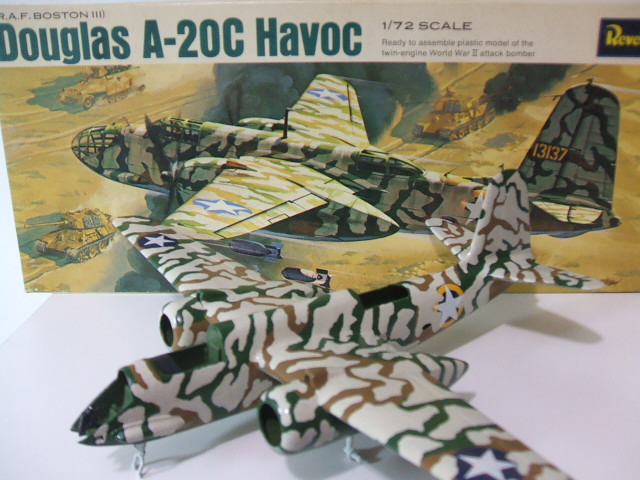
Decals on this old kit were not usable. They were badly yellowed and splintered when put in water.
Well, you might say, they’re fifty years old–of course they’re bad. But not so fast. Fifty-year-old decals from Authenticals work just like the day they were printed. No yellowing. No cracking. Perfect. Unfortunately, they aren’t made any more, but you can buy them on eBay for very little money because nobody knows how good they are (old decals! ewwww!).
Oh, wait a minute.
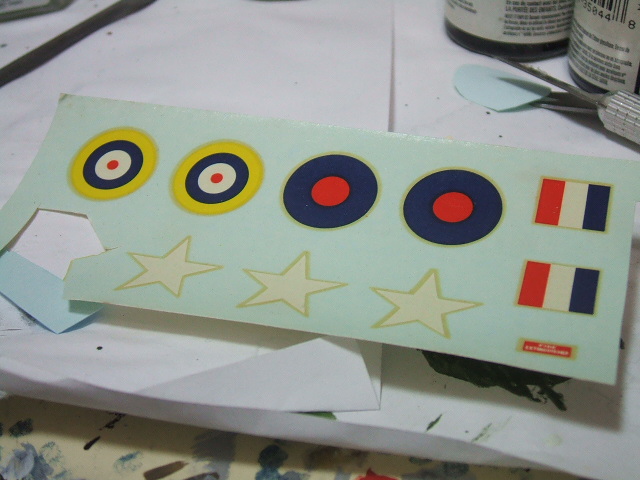
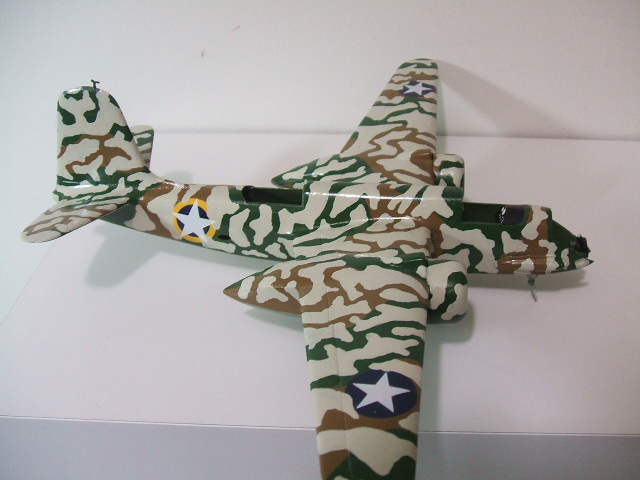
Anyway, I used Authenticals U.S. stars for the insignia. It’s difficult to find plain “stars” so I cut up some U.S. Navy markings to make it work. The RAF roundels were taken from the new Airfix Spitfire Mk. 1 kit. I used insignia blue to paint out the center portion of the markings to avoid any unfortunate “show through.” Then I applied the British markings to the future before I began painting the “tan” splotches, so that I could use the tan to paint over parts of the RAF insignia.
I decided to do this in “stages” to avoid fatigue. Each stage was about an hour long. Here, after two stages, is the result of the first coat. Halfway there!

My intent was to try to match the Leynnwood painting as closely as possible (for me). I don’t think I did too bad. The white stars were applied after the painting had been completed.
After the paint dried, I went and did some touch-ups and a second coat of “tan” on most of the splotches. Splotch technology has really advanced in recent years.
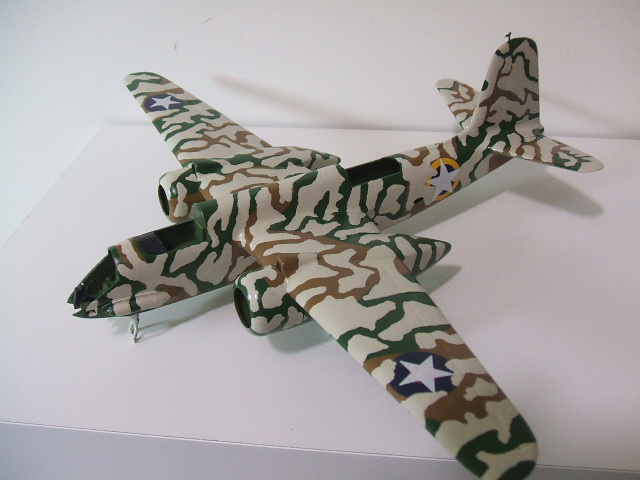
Notice the difference between Lynnwoods’ pattern on the port side of the aircraft and my sorry attempt on the starboard side.
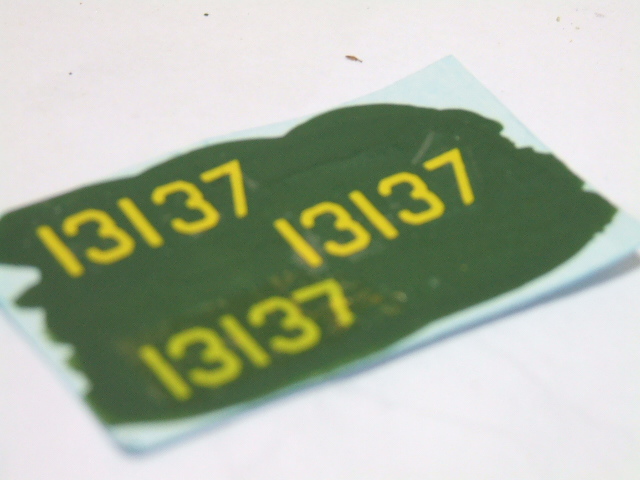
The serial number had to be replaced. I used Woodland Scenics “letraset” -style transfers. First you rub them onto clear decal. Then apply them to painted decal. Then cut out and apply to the model.